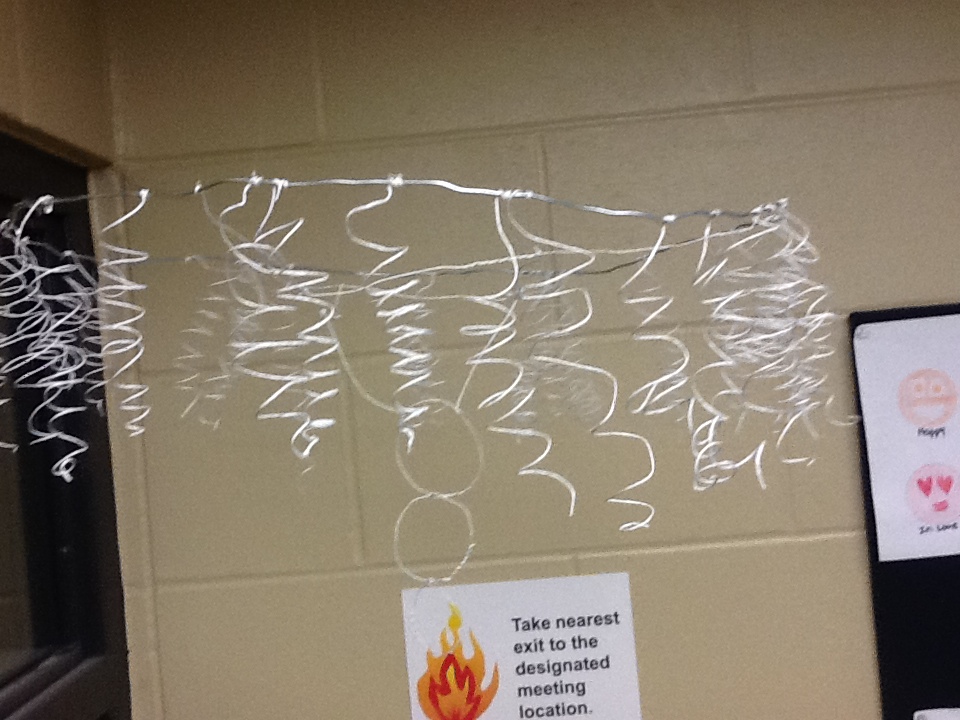
My second challenge i choose was installation. Installation was when you took a sort of sculpture that is able to be picked up and put somewhere else. For the project a did a chandelier made of wires and hung by fishing line. This project changed so much from the beginning. the original plan was to have it spiraling down and for different colored pencils to be hanging instead of thin wire. then it changed to three tiers but getting them all level made me so frustrated it didn't work. Lastly (and what I have now hanging up in the art room) I ditched the tiers and stuck with one rings with individual coils of thin wire. Because it would take way to long to describe how I did every idea and process I'm sticking with the the last and final idea.
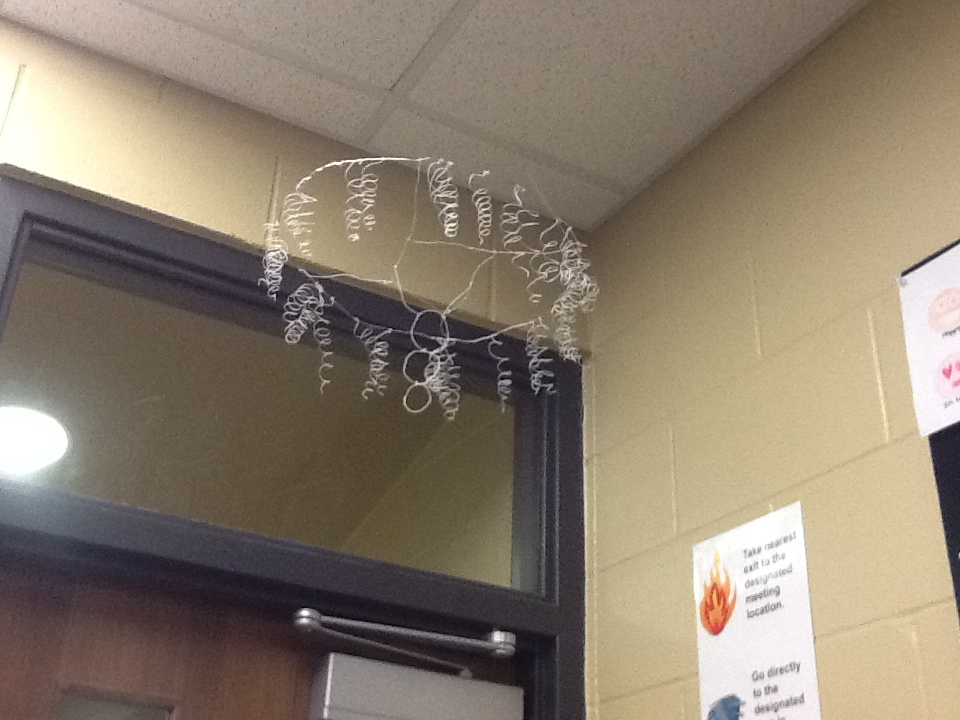
In order to get the single loop I took a thicker wire and (using pliers and wire cutters supplied by Mrs. Meyer) wrapped it into a big loop and wrapped the ends together around each other so it would stay in place. Then I took the small thin decorative wire to make the little coils hung around on the loop. To make the coils I put the end of the decorative wire between my middle and index finger and continued to wrap it around my index index finger. To attach the coils in the big loop I bent an end of the coil up separate of the coil it's self and wrapped it around the loop. I did this until it was full. The to make the square center piece I took 4 peice of identical length of decorative wire and attached them to four separate places on the loop making a square when i attached them to each other. To make the peice hanging from the middle I made three different shaped circles and used small wire to bind them together. I then took to bigger pieces of wire, attached them to the center square and pushed down the connecting wire to that it hung down. And there you have it, my Wire Chandelier! Later on I plan to take the wire off and replace it with something else like old paint brushes or maybe shards of glass so when light hit it it shined you know? It's a constant work in progress, and I loved working on it!
In order to get the single loop I took a thicker wire and (using pliers and wire cutters supplied by Mrs. Meyer) wrapped it into a big loop and wrapped the ends together around each other so it would stay in place. Then I took the small thin decorative wire to make the little coils hung around on the loop. To make the coils I put the end of the decorative wire between my middle and index finger and continued to wrap it around my index index finger. To attach the coils in the big loop I bent an end of the coil up separate of the coil it's self and wrapped it around the loop. I did this until it was full. The to make the square center piece I took 4 peice of identical length of decorative wire and attached them to four separate places on the loop making a square when i attached them to each other. To make the peice hanging from the middle I made three different shaped circles and used small wire to bind them together. I then took to bigger pieces of wire, attached them to the center square and pushed down the connecting wire to that it hung down. And there you have it, my Wire Chandelier! Later on I plan to take the wire off and replace it with something else like old paint brushes or maybe shards of glass so when light hit it it shined you know? It's a constant work in progress, and I loved working on it!
 RSS Feed